Friday, April 10, 2009
kid craft: egg cartons into eggs
recently, our city switched over to a single stream recycling system with lovely rolling blue bins. it's great, you can recycle... well, pretty much everything. paperboard. (ooh!) every number of plastic. (ahh!) combine that with our backyard composter (which is where our flushable diapers end up, along with the usual kitchen scraps and such), and we now have to take the trash out because it starts to get gross rather than because the trash can is full. weird.
the exception to this is egg cartons (the cardboardy kind). i find them consternating -- can't recycle them (hmm, or can i? keep meaning to check on that, their website leaves it open to interpretation), don't want to throw them away. i've taken several to my daughter's preschool for art projects, and we've used them for a few things at home, but somehow we always have at least three floating around the house. until the baby chews on them, generally.
we have an annual egg hunt with friends in the park -- everyone contributes eggs then we hurry to "hide" them while barely holding the kids at bay, then they run around like crazy scooping them all up. who knew something so simple could be so fun? last year, i made fabric eggs. this year i was stumped.
until i spied those egg cartons in the corner.
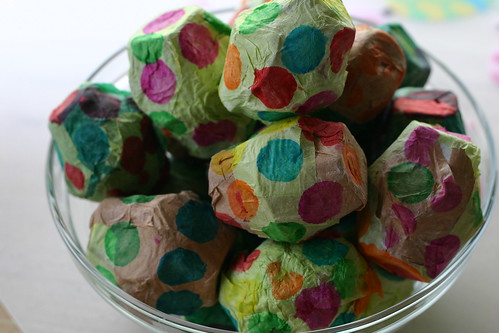
i don't really know what to call these things. they make me think of wee tiny pinatas, but they also work a bit like cascarones if you fill them with confetti. they're papier-mache. they're fortune eggs. how about "recycled egg carton fortune egg hunt eggs"?
who cares what they're called. here's how we made them (the quick version, because there's not much to mess up, and also because i'm sleepy).
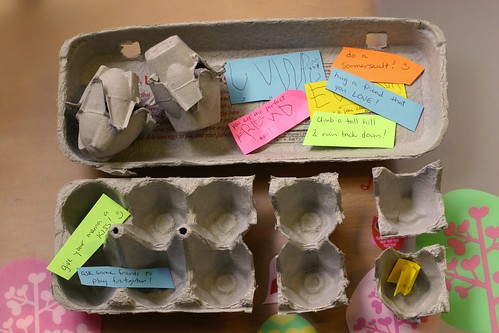
materials:
cardboard egg carton(s) -- each carton yeilds 6 eggs
newspaper or a paper bag
flour
paper confetti (optional but fun)
tissue paper (optional)
paints, stamps, crayons, etc (optional)
1. cut & trim egg cartons
remove the lid and flap from the egg carton, leaving just the egg holding part. cut apart each of the 12 egg cups. trim off the extra bits to yeild a nice round egg half that doesn't have anything sticking out to the side. (the parts that stick straight up are fine to leave if you just round them off a bit -- that can help the egg halves to lock together.) the trimming is not absolutely necessary but yeilds a smoother more egg-shaped egg in the end.
2. fill the eggs with a surprise
my 3-year-old assistant decided to fill the eggs with "jokes", which eventually morphed into suggestions for fun activities ("hug a friend that you love", "run up the hill and sing a song", "jump up and down on one foot", you get the idea). you could make up fortune-cookie type fortunes, coupons for favors/activities (particularly within the family), scavenger hunt clues, or trinkets of some sort. or candy. there's always candy. don't forget the confetti if you like that sort of thing (the biodegradable paper kind, please).
3. seal them up
we papier-mached (hey is that a legit verb?) them closed. we used a paste made of slightly more water than flour applied to strips of paper bag (because the newspapers had just been part of the recycling pick-up the day before). just dip your strip of paper in the paste, wipe off the excess (you know the drill), then wind it around the seam between the two egg halves and smooth it down a little. you can let them dry at this point, or continue immediately to the next step. if it needs more structure, you can add a second strip of paper, but i found that they held together just fine.
4. decorate
to cover with tissue paper, dab a bit of paste onto the egg (because you can't dip the tissue into the paste directly, it disintegrates). wind the tissue -- assorted colors or not -- around the egg until you're happy. one layer or many, it doesn't matter for structure, it's purely decorative. once they dry, you can further decorate with paint, crayons, etc. we used some dot ink stampers.
that's it! assuming you don't add too many layers of tissue, these dry pretty quickly so you don't need too much advance planning (says the woman posting this the day before easter). they're ready for all your fake egg needs, easter or otherwise. you probably shouldn't whack anyone on the head with them (as they're harder than you might think -- the eggs, not the heads), but they're perfectly suited for some gleeful stomping. enjoy!
Sunday, February 15, 2009
cinnamon ornaments
sometimes people ask me how i come up with ideas. i suppose sometimes clever little thoughts just pop into my head out of nowhere, but generally it works more like this:
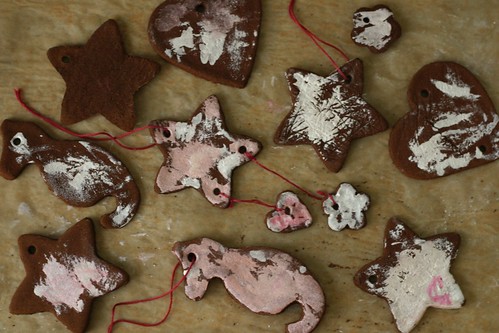
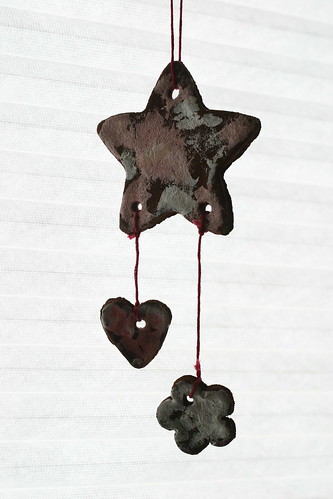
eva and i made valentine ornaments for her friends out of cinnamon dough. why? because i finally got around to cleaning out my spice cabinet last week, and came across three old containers of cinnamon (that doesn't count the three different kinds of good penzey's cinnamon i also had in there). i will fess up that one cinnamon was stop & shop brand, which only exists on the east coast (i think?), which means i bought it in college. and i've already been to my 10 year reunion. (how that was still in there, i'm not sure...) so, what to do with all that cinnamon? wait, i seem to remember the existence of some sort of cinnamon dough... off to research, and this is what i found: a dough made of cinnamon and applesauce. lucky, because i had a partial jar of applesauce in the fridge that was soon to be a bit questionably old (how long does applesauce keep, anyway? seems like forever...)
true to form, i of course had to modify things a bit. i found a recipe on kaboose (there are many, this is the one i randomly chose), but it called for elmer's glue. now, i'm sure school glue is technically edible, but i wanted to make these entirely out of food just in case (and a good thing -- the very first recipient took a very cute bite out of one of the hearts before i had a chance to advise otherwise -- oops!). but what is school glue anyway but a kind of paste? and paste is just flour and water... so i replaced the glue with a flour/water mixture that was approximately the same consistency. why not?
rather than let them dry for a few days, we put them in a 200 degree oven for a couple hours, turning every 30 minutes or so (or, once the edges began to curl). we found that the optimum thickness is in fact between 1/8" and 1/4" -- a bit thicker worked (just took longer to dry) but the thinner ones split a bit. that said, it's not so fussy that you can't just let your preschooler roll them out and cut them herself. (she did fine with the hearts and stars, but needed some help with the seahorses.)
we jointly came up with the idea to use our mini-sandwich cutters to make small shapes and connect some of them into mobiles. she also wanted to decorate them, and so we tried using luster dust from my cake decorating supplies. we mixed it with orange extract (which i never use, also discovered in my spice cabinet clean-out), and added food coloring to half of it to get silver and pink. she really had fun decorating, but unfortunately unlike when applied to a softer medium like fondant, in this case the luster dust just sort of flaked off when it dried. so, it's fine as long as you don't handle them too much, and worst case, you have silvery fingers.
these would make great christmas tree ornaments or gifts for another occasion beyond valentine's day. the cinnamon smell is really lovely, and i presume they keep indefinitely.
happy valentine's day! a bit late in posting, though the treats were delivered on time -- except for a few, which haven't made it into the mail yet. oops.
felt veggies
i made an assortment of felt vegetables for my niece for christmas. i'd never sewn any stuffed things from felt before, but that's how i craft (apparently) -- do something new, get the hang of it, then promptly become bored of it. :)
(i should say, i'm catching up on posts from before the holidays -- because i didn't want to spoil the surprise for the various gifts i made, and also because i've been swamped since then.)
i originally planned to design all the felt food myself, but i was short on time in december, and am finally starting to learn from past experience. so, i searched for and found some really cute patterns on etsy from seller umecrafts. and then i splurged and bought the set of every kind of vegetable she offers. i was really happy with the patterns -- for the most part, the instructions were clear (every so often, a step was less than obvious, probably because i'm new to this), and she used really interesting techniques to create the various shapes. so, by (for once) not trying to recreate the wheel, i ended up learning a lot, and as a bonus, got my project done in less time with less frustration. (though, i did have to get over the sense that i was somehow cheating...)
i wanted to use wool felt, and after some research, i ordered from prairiepointjunction.com because they had a really big selection. after ordering, i discovered from their FAQ that the felt isn't terribly colorfast, and i was concerned, since i was making this for a baby, and babies chew on everything. i contacted prairie point junction, and they were very helpful, putting me in touch with the manufacturer. in the end, the answer was that the dyes are the same as what is used for clothing -- so, probably not the best thing for a baby to eat, but not really dangerous either (note: i'm paraphrasing here; if you're concerned, don't take my word for it...). the colorfastness of the felt varied tremendously from color to color, and in surprising ways. (one purple shade bled like crazy, the other not at all. same with the greens. odd...) oh, i was also pleased that prairie point junction offered embroidery floss for purchase that was preselected to match each color of felt they offered. that saved me having to make a trip to the local craft store after my order arrived (key during a the busy month of december).
so, all that was about locating the patterns and supplies, but nothing so far about the process. i guess that's because after i had everything (including the freezer paper for transferring the patterns -- who knew, they don't just sell that in every grocery store anymore?), they really just fell into place. easy, pretty fun to make, and turned out really cute... the hardest part was choosing which veggies to make, knowing i wouldn't have time to make them all. i still plan to make more for my little one... but now that i've already figured it out, i'm in less of a hurry to do more. they're worth the time, though, so this will reach the top of my queue sometime soon...
do you have other sources for felt or patterns for felt crafts? i'd love to hear about it in the comments.
Sunday, January 11, 2009
snowflake cake
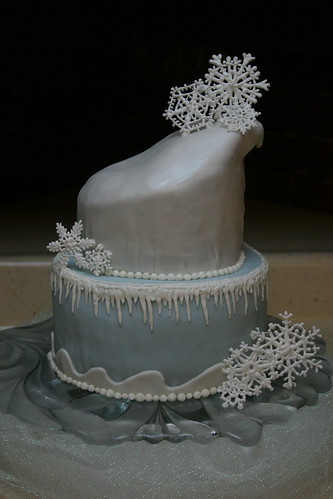
while up north for the holidays, my mom had a milestone birthday (she's not the type, i'm sure, to care if i mentioned which one, but you know...) i'm rarely around for her birthday, so i wanted to take the opportunity to make her a cake. i had a big idea for a far more complicated very personalized cake, but every single person i told paused, then said: "oh. hmm." turns out that translates as "i'm pretty sure you could do that complicated cake, but that in the process, you will become a stressed out crazy person who is insufferable to be around." turns out they (husband, sisters) were all likely correct. so, plan B.
we were experiencing record snowfall during our visit. as in, 33 (or more) inches of snow in one month, the most ever on record. that in combination with temperatures such as 15 below zero (yes, farenheit!) kept us from leaving the house more than once a week or so. i grew up in this northern extreme climate, but this was just ridiculous. so rather than fight it -- my sister decreed that no one was allowed to complain about the weather unless they were actually outside in it -- i thought we'd embrace it as inspiration for the cake.
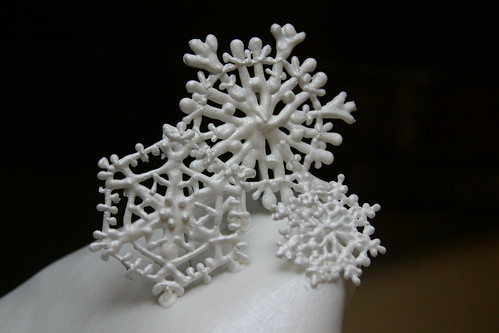
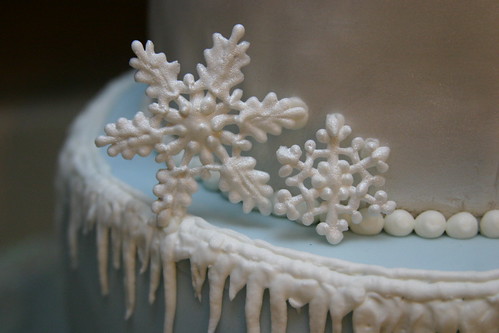
the hardest part of this cake was making the royal icing snowflakes, and honestly they weren't that hard other than that they were very prone to breaking. predicting this (wow, i'm a genius!), i made about three times what i thought i'd need. turns out i only broke about half. um... success!
sadly, you can't see it in the photos, but larry wired up some LEDs to go under the glass cake plate. they were six independently-controlled strings he set up in a wave effect that looked like the light in blustery, blowing snow. it was really impressive and went perfectly with the snowy theme. always fun when our interests can combine into one project. :)
i think perhaps the snow cake didn't appease the gods of winter. as it turns out, we may have angered them: the day of the party, yet more bad weather moved in, and half the guests couldn't make it. and in fact, *we* couldn't really it the 10 miles to my aunt's house, so we changed the location at the last minute. (as a kid, half my winter birthday parties we canceled, so i think a half-cancellation is probably considered a success with those odds?)
my mom seemed a bit "who, me?" regarding the cake (insisting i not go to any trouble, surprised i was bothering to cover it with fondant). well mom, for you i'd happily make a cake as big as a real snowdrift. okay, not that twelve foot high monstrosity on your patio this year, but you know what i mean...
Subscribe to:
Posts (Atom)