Tuesday, April 10, 2007
naturally dyed eggs
while julie was here, i dyed eggs using natural dyes, something i'd never done before. a reasonable thing to do would be to try three or four colors, so i decided on ten.
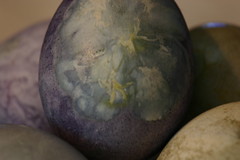
along with the several cups of vegetables or a few tablespoons of spices, i added 1-2 T vinegar along with 1/4 tsp alum per cup of water. i'm sure the vinegar helped, and while the alum didn't always make a difference, in the cases where it helped, it was key. for example, red cabbage dyed the eggs a barely-preceptible faint pink, but after adding the alum, the water instantly turned deep bluish-purple, and the eggs took a lot of color very quickly. basically, i brought to a boil then simmered each pot for 15 minutes, then dyed and hard-boiled the eggs at the same time by simmering for 15+ minutes. if i thought the egg could use more color, i switched to the "cold" method, and let it soak in strained dye in a glass for a good long while. (i have no intention of eating the eggs, so i didn't worry that they became overcooked, took on weird flavors, or sat out of the fridge in dyes for a long time.)
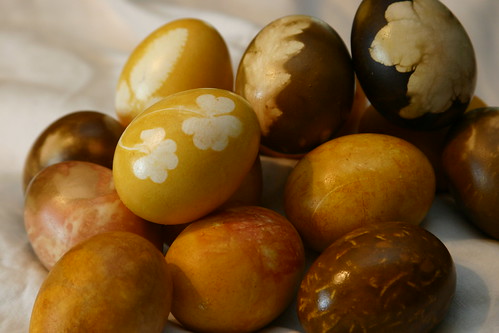
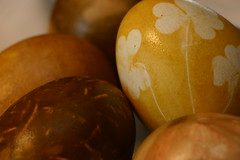
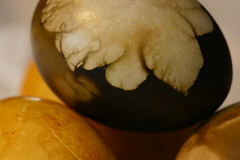
the best dye of all was onion skins -- i used yellow and red onions, and to get a good number of skins, i rifled through the bins of onions at HEB collecting skins -- while eva patiently looked on -- to go with my modest onion purchase. (this didn't phase the cashier at all, causing me to wonder what sorts of things stranger than bags of onion skins they see in a day?) yellow onion skins resulted in beautiful eggs a bright golden yellow color (almost indistinguishible from the tumeric eggs, actually). an egg directly wrapped in yellow onion skins came out yellow with rust colored patches. red onion skins created some deep olive green eggs, one left in too long was nearly black (with a white flower). one egg wrapped tightly with red onion skins came out pink and a paler shade of olive green. nice.
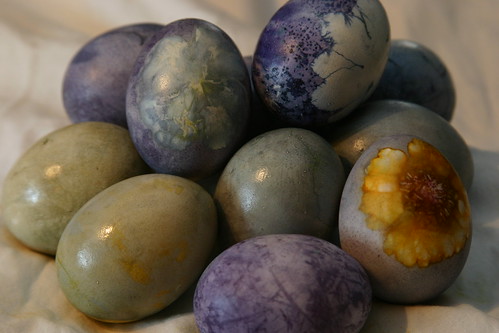
onions and red cabbage were the best, but i also had success with beets (brick red, but only after soaking for several hours -- before that, a displeasing brown, alum or not), tumeric (very similar to yellow onions but less dappled and more likely to stain everything), and hibiscus tea. i expected the tea to result in purple or blue eggs, but instead got a sage green, both with and without alum, but darker with). very unexpected. i also had a few disappointments -- spinach barely colored the eggs at all -- even after i tossed in some fennel fronds for good measure, and cumin created not an orange-brown, but just plain brown -- even after i added some cinnamon just in case. coffee also did little but lightly stain the egg. however, imagine the confusing smell at this point: tumeric, cumin, cinnamon, fennel, onions, coffee, and cabbage... yum! (??)
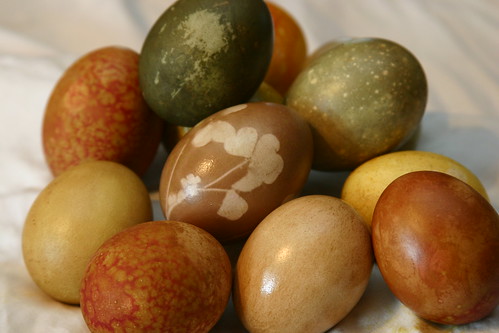
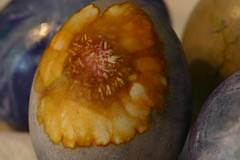
i also tried some special techniques, with varying degrees of success. i tried layering the colors, but one tended to overwhelm the other regardless of the ordering. i put oil in some of the cold dye, resulting in some interesting brown-and-red spotted beet eggs, which seem to come from some seussian bird creature. i rubber-banded onion skins directly to eggs as mentioned above, yeilding a sort of tie-dyed effect. but by far the best technique was the resist method -- i placed leaves, flowers, etc on the eggs and held that in place with a square of sheer fabric pulled taut and rubber-banded at the back of the egg (hosery was suggested, but i apparently finally threw out every last pair of my 90s nylons at some point, so in a pinch i used scrap organza, which may actually be the remnant from my wedding veil but i'm not positive about that). i achieved some nice, crisp outlines of azalea blooms, clover leaves, and various tree leaves. the most unexpected result, however, came from a yellow flower i picked along the sidewalk when julie and i took eva for a walk in the wagon. the flower transfered its yellow petal color and red center color onto the blue (red cabbage dyed) egg. it looks almost like a watercolor painting of a flower... what a lovely surprise.
next time, i'll stick to the more successful yellow and red onions, red cabbage (with alum), and maybe beet or hibiscus. i'll also try out a few items that didn't make the cut this year, like blueberries, cranberries, and maybe some spices. i'm trying to think of how to make this a more kid-friendly project -- the dyes work best when on the stove, and even at that, the results are not of the instant-gratification variety. we'll work it out, though, because i find the results far more pleasing than the super-bright PAAS dyes. i considered combining this with my ukranian egg skills (a wax resist batik method), but the natural dyes tend to rub off, so i don't think it would work. in fact, these eggs aren't so great for hiding indoors (tumeric-stained upholstry, anyone?), so eva didn't get to hunt them this year since she was sick and it was 37 degrees outside. all in all, a fun project.
Tuesday, April 3, 2007
wii cake
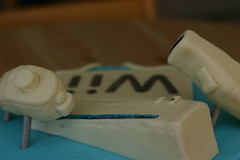
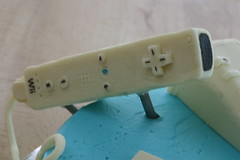
it started out well. without referencing a recipe, i made up some cherry filling (larry loves cherries) and it turned out really well. i adjusted the buttercream and cake to be almond to complement the filling. i sculpted a kick-ass wii remote and nunchuck out of white modeling chocolate (with a few marshmallows in the middle to reduce the amount of chocolate needed, something i won't do again -- the springy marshmallows kept trying to burst out, making little bubbles on the surface). i went a little nuts on the details, imprinting tiny letters "c" and "z" on the buttons, adding the one-two-three-four dots above the blue lights (makes sense if you've studied a wiimote), carved out the little plastic latch for the battery cover, added the crimping where the cord is attached to the nunchuck, etc. that part was fun.
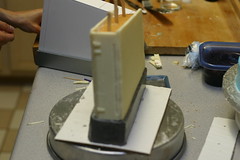
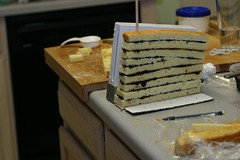
then i boldly began to form the wii itself out of cake. i knew this was a bad idea, but suffer from some overconfidence in my ability to do things i've never tried before when it comes to making stuff. i sliced my little two inch wide layers, and stacked nine of them up to reach the height of the wii standing in it's base. that all went okay. i inserted wooden dowels to give it some structural support, but alas, the dowels had nothing in which to anchor. (hmm, have i hit you over the head with foreshadow yet?)
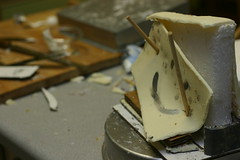
i rolled out and cut and carved all my wii chocolate panels. (no problem.) i attached the pieces for the base of the wii. and painted it with luster dust to achieve the metallic-plastic finish of the real thing. (easy, lovely.) then i attached one giant side panel (hmm, okaaay...) then the other side. now working as quickly as possible so i could get the damn thing back into the fridge to harden up the chocolate, i managed to get the front panel in place. sensing disaster, i called for larry to come take a photo before things went horribly, horribly wrong. the weight of the chocolate was pulling the cake, dowels and all, over to the side. i tried propping up the edges in various ways, all to no avail. sadly, the ultimate outcome was pretty clear. (apparently there's a reason people don't routinely make 9-layer cakes that are 2 inches wide.) damn you, laws of physics!
at this point, it was nearing 3 a.m., but i was not ready to accept defeat, since i'd put about 10-12 hrs into the cake *that day* (that didn't include the earlier full day of baking the cake and making the filling, royal icing, and buttercream). in one last desperate attempt, i pulled off the chocolate panels and tried to affix them to a styrofoam-and-cardboard base i quickly mocked up. it was soon apparent that this plan could work (yes!) -- if i had about 3-4 more hours to work on it (no!). in the old days, i would have gone for it (unable to just let it go, eager to throw good money after bad, so to speak), but that's not a great plan when you're responsible for a toddler, i suppose. after much frustration and a few tears, i painted a smiley face on the side of the failed cake, stabbed it with those useless dowels, and went to bed.
i'm used to biting off more than i can chew and having to redo parts of my projects, or work through some serious frustration. what i am not accustomed to is catastrophic failure. i was really bummed by both the failed cake and all the wasted hours, but my reaction was clearly colored by fatigue, because i felt more-or-less fine about it in the morning. by then it was funny (mostly).
the next morning, i pulled out the low, round turquoise cake (which was to have been the pedestal for the grand, tall wii), and contemplated "plan B". while i had been throwing spatulas and bits of chocolate the night before (just briefly :), larry had the foresight to salvage the front panel from the wii, so i used that to make a wii sort of popping out the top of the cake. turned out a bit dorky, but it was an homage to the "plan A" cake, so i'm okay with it. i attached my wiimotes up on some luster-dust painted dowels to get at least a bit of three-dimentionality out of the flat, flat cake, and used one of the big side wii panels as a palette for a wii logo. i threw all this onto a cake and called it a morning.
it's a shame, because the way it was shaping up, that wii was going to be awesome. after the fact, i can think of about twenty things i could have done differently to prevent or fix the problem, but you know... that's why they call it a learning experience. oh, wii cake...
but, it was tasty. eva loved it, overexcitedly calling for "more papa happy cake papa happy birthday papa cake" (with a "please mama" tacked onto the end for good measure). it makes a good story. so, all in all, it turned out okay.
(see my flickr photo set for a bit of extra commentary.)
Saturday, February 17, 2007
crocheted balls for cassia
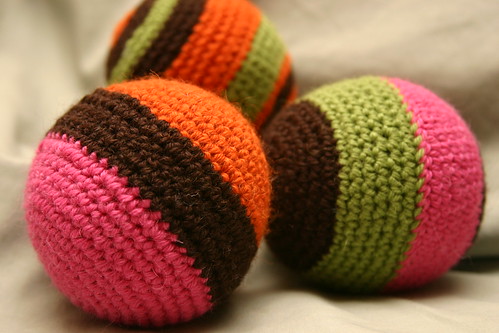
these are the soft throwing balls i made for cassia for her first birthday (she turned 1 when eva turned 19 months, on the 7th -- so easy for their mamas to remember the age difference!).
this is basically what i was going for on my first attempt, but it came out more in line with my expectations this time. i used a different pattern [note: link now broken, sorry! i didn't save the pattern, either -- if anyone has a good one, post it in the comments. 02.07.2008] (one that lora found for me on craftster), and the increases in stitches by row is much more methodical and makes for a round ball, which is... you know, preferred.
i found this great yarn, nashua handknits "julia", which i bought (at hill country weavers on south congress) in eight colors so i can mix and match for several different projects. it's alpaca/mohair/wool, and has to be hand washed in cold water, which is of course ideal for children's toys. :) i used a G/4.00mm hook, which was sufficiently small to keep it tight and preven the stuffing from escaping (at least at first, i guess it may work its way out over time?)
i'm a big fan of the orange and pink one, very modern and sleek. the green and pink one is okay, but i learned not to put the darkest color on the ends because the optical illusion make it look oblong. i'm not a fan of the stripey one -- it looks too reminiscent of a 1970s afghan, which i guess can be a good or bad thing depending on your perspective.
as it turns out, cassia is a big fan of balls. they have a game of playing soccer with them, with cassia trying to throw the balls into a box or the like, so her parents can throw up their arms and shout "goooooal!". jenny and cassia introduced this game to eva when they were here for dinner, and she was suitably impressed. (however, eva's probably confused as to why, when you throw up your arms, you sometimes shout "goal" and sometimes shout "touchdown". it's good, this early exposure to multiculturalism. haha.)
i really love the colors of this yarn. that's the best part. i'm getting faster at crochet, so let's say these took me maybe 6 hours for the set...
i'm so bad at estimating, but i'm doing it because it sort of adds to the sense of accomplishment in a weird way. the opposite of saying "look how many hours i wasted", rather, i can say "look how many hours of my life i spent doing something i enjoyed, and making something for the people i love." i'm explaining, lest my struggles at estimating the time be taken the wrong way.
enjoy, cassia, and happy birthday! goooooal!!!!!
sadie's blanket
this is the blanket i crocheted for eva and "seh-deee". it's nine granny squares (you know, remember those multi-colored crocheted blankets? all granny squares). i used bulky yarn -- okay, i don't know all the yarn terms and the label has since been tossed, so i'll just call it "bulky" but not super bulky -- and a 8.0mm hook, which was one or two sizes up from recommended. i wanted an open look, and it is fun for eva to stick her fingers through, but i tends to get caught on things like toy stroller handles. it's probably about 30" square.
unlike many of my crochet projects, this one actually uses more than just single crochet -- hurray for chains and double crochet! however, the best part was the pattern of stitches. it was very appealing to the mathematical side of my brain. each square is worked from the center in six concentric circles, and each "round" has its own pattern, for the sides and one for the corners. crochet patterns aren't written exactly this way, but i essentially "convert" them into a more mathematical formula because it makes more sense to me that way. it's surprisingly similar to computer programming, with all the nested loops and such. hey, i get to use my brain!
so, on the first square, it took me a good amount of time to decipher it all out and "translate" it in my head. then, the second one was easier, and by the third i had it memorized and eva was free to play with my scrap of paper where i had jotted down the code (her scribbling was slowly obscuring the numbers anyway :). by the ninth square, though, it was no longer challenging, so that's how i knew the blanket was big enough. next time i'll do a different kind of square so it will be fun all over again. or, now that i know how it works, i'll make up my very own patterns! even better.
after i got the hang of it, i could complete a square in under an hour. so, including the time it took to stitch it together, it probably took just over 10 hours.
eva's favorite way to use this blanket is to convince someone to throw it at her from across the room, and then she whips it off her head and giggles. she does on occasion put sadie on it, but she prefers the 4"x6" blankets that came with her doll house. apparently toddlers lack a sense of proportion.
river's ball
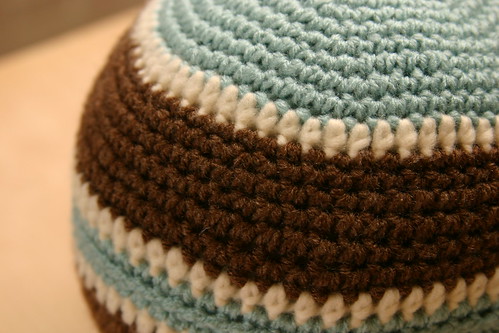
this was my first attempt at crocheting a ball. i looked at an unreliable pattern, so while i thought i was making a 5" diameter ball, it ended up several inches larger. oh well, that just makes it a two-handed throwing ball. (in addition to the size being off, it's pretty flat on the "poles" and straight on the sides, making a cylinder of sorts.)
i embroidered his name using a basic chain stitch. i found out that crochet rows in effect run in a spiral (as opposed to knitting where you have a definite grid pattern). so, i started out stitching the letters using the crochet stitches as a grid, but then noticed my letters were all in reverse italics! i compensated for this eventually, but overcame my urge to rip out all the existing letters. so, it's got that definite homemade look going for it -- that and the somewhat 70s colors. :)
this ball was filled with basic fiberfill (polyester, i'm sure). i'm sick to death of using that stuff (it's all i've been able to find in the horrible chain stores), so i finally ordered some wool stuffing from some lovely waldorf doll people online. that way, i'm not using nice wool yarn and crappy stuffing, or working for ages on a natural cotton doll (like sadie) and stuffing it with gross polyester. i think that would give the items some much needed heft, as well.
i also bought some bells... i thought about using them, but then does it start to seem a bit too much like a cat toy?
i'm not really sure, but i think (due to the larger than expected size), this probably took around 6 hours. i'm bad at estimating, but i'll try to keep track (a little) in the future. who knew i spent so much time crafting!
anyway, i know river likes to throw soft balls, so i thought he might like this. this project was a definite learning experience, but i'm sure river doesn't mind.
doll sling
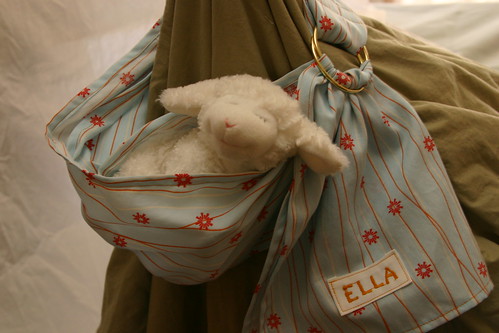
today's fun-during-naptime project was to make a baby doll sling for our little friend ella, who is having her second birthday party today! (nothing like waiting until the last minute, but i couldn't think of a good idea until this morning.) ella loves her babies, and is about to become a big sister, so this seems like a good gift. (maybe she already has a doll sling? but, who can have too many slings?)
it's not like you really need a pattern for a doll sling, but i have had great luck with the practical, easy-to-follow patterns from jan andrea in the past. sure enough, she steered me right once again.
the fabric is from a duvet cover that was on clearance at target last year (look for a dress for eva in the same fabric coming "soon" -- there are pearl snaps (ala western shirt) along one edge, which i hope to utilize for that project, still thinking it through...) anyway, it's a nice soft fabric, girly-fun but not princessy.
it's a basic ring sling, really, with a box pleat on the shoulder. i added a patch on the tail with ella's name, and i'm proud that my skills at using a basic zigzag stitch to machine embroider (sans computerized machine) are improving. i worry that the sling may be a bit small, but i didn't want the tail to be too long and become a tripping hazard... hopefully it will work. (i'll test it on eva when she wakes up, she's roughly ella's size).
lots of doll slings i've seen don't seem to keep the dolls in very well, and i think that's because the "pouch" part isn't secured, so the kid ends up wearing a tube rather than a pocket. i tried to fix that by folding the fabric in half before affixing the rings, but that inadvertantly made it work for one shoulder rather than both. i guess i'm okay with that, since having the baby stay in is probably more important.
i must credit the jan andrea pattern for the idea of using velcro at the rings. rather than permanently sewing the rings in place, they're secured with velcro. that way, if the child gets the sling caught on something and pulls, the velcro should come undone, thus avoiding a strangulation hazard. i bought velcro that has both hook and loop on each side (cool, huh?), so it should be snag free -- so if you forget to close it before throwing it in the wash, it doesn't attack and destroy your underwear.
i think i completed this in just over an hour (not counting my jaunt to the fabric this morning for macrame rings). pretty quick little project. i'm a fast sewer, in part due to practice, and in part due to the fact that my presser foot was maladjusted for years, so my machine only had "off" or "zippy-fast", so i got good at zooming along. :) i've since had it replaced, so normal speed sewing is now an option.
thanks to winky for being the model. off to get ready so we're not late for the party.
Update: eva ran away screaming "no!" when i attempted to have her try it on. she seems to have this reaction to everything i sew, which is moderately distressing, i'll admit. wendy liked it, so it just remains to be seen if ella will. if she doesn't, i'd bet she'll warm up to it once she sees her mama carrying the new baby. modeling is a really strong instinct (i say, as eva is across the room next to papa turning a screwdriver at various bolts and things on larry's project.)
Wednesday, February 14, 2007
sadie
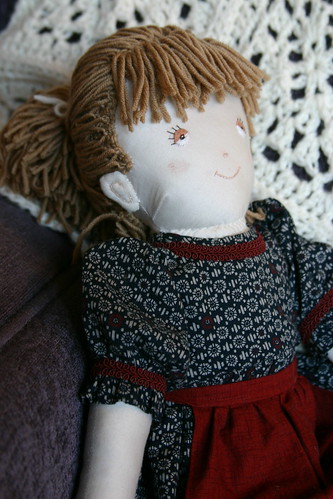
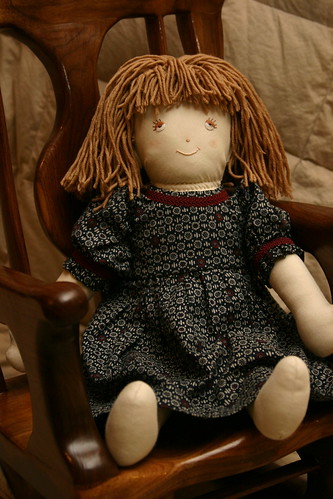
sadie is the doll i made for eva, let's say "for christmas" (since she didn't get anything else from us, and i made this between christmas and new years, so it's sort of a yule/solstice time of year thing, i suppose). she's an 18" doll with moveable arms and legs (but no knee/elbow joints). straying from the pattern, i added embroidered ears (my mom said that dolls my grandma made had ears, and i tried to copy the idea as best i could understand it over the phone), and i added the all-important belly button and nipples, which eva spotted immediately. i also changed the hair dramatically from what it said in the pattern, but i'll save that for another time.
i used the eyes suggested in the pattern, but i'm not that happy with them. i made a doll for a friend's girl many years ago, and i made up a method for making multi-hued/flecked irises that i remember liking much more. i'll return to that in the future. these eyes give her a bit of a dopey expression, i think... i did the left one first then took 8 attempts at the right one to make it match exactly in size, angle, position, etc. i don't know why it was that difficult -- or why i was being such a perfectionist making eyes i didn't like in the first place!
the dress is some fun japanese fabric i found, i thought it struck that balance between classic and a bit fun/modern (and of course avoiding anything overtly floral or princessy). i used the dress pattern that came with the doll, but it's a bit too traditional, with the puffy sleeves and all. i'll make something up for the coordinating bit of japanese fabric i bought for a second dress. the thing about doll clothes is that for less effort you could make toddler clothes (easier because the bits aren't so tiny), so we'll just see how many outfits sadie really needs.
that said, the apron is eva's favorite part. after a lucky bit of suggestion from a friend's 3 1/2 year old (they know all the fun tricks!), she's been enjoying having the apron tied on her so she can dance, waving her hands turning in a circle jumping around, saying "dansh, dansh, dansh!". she sometimes insists "mama wear apron. mama dance!", but as it is about 5 inches wide, it takes more of a cod piece or fig leaf appearance on my size frame. to this end, i made her a dancing skirt, which she hates (as of its introduction today, we'll try again later). she runs away screaming "nooooo!" and when i tried tying it on her to show her in the mirror (usually a fun activity), she went into full on back arching rolling on the floor tantrum mode. yikes. so much for the dancing skirt.
i have no idea how much time i spent on this doll. several hours to sew and stuff the body (6ish?), a good 3 on the embroidery, maybe 3 on the clothes, a good hour on the first attemt at hair which i then had to cut off because the yarn frayed dramatically, at least an hour on the ears, 4 or so teaching myself to crochet and making the wig cap, and probably 5 evenings hand tying the hair one piece at a time, so maybe 10-12 hrs. of course, i forget to consider things like washing and pressing the fabric, cutting out the pattern, ... and, i tend to dramatically underestimate my time. so let's say something around 40 hrs in all? that's a total guess, but better than nothing.
so, such is sadie. i'm sure she'll be making return appearances in this blog...
craft blog
Sewing, quilting, embroidery, crocheting, dollmaking, Ukrainean eggs, cakes (cakes aren't technically crafts, but we'll just get over that), origami, ..... we'll just see where this goes.